Quickstart
See Reference Project Inputs for all information collected to create a new django-cookiecutter project.
Create a GitHub Repository
Your new GitHub repository information is required to generate your django-cookiecutter in these steps.
project_name
The name of your new Django project, used in the documentation, so spaces and any characters are acceptable here.
Typically the repository name in sentence form.
project_short_description
A sentence describes your Django project.
Typically the repository description.
Create Virtual Environment
Select the tab for your preferred Operating System.
python3.12 -m venv venv
source venv/bin/acivate
pip install --upgrade pip
You will have a folder structure similar to this.
projects
└── venv
python3.12 -m venv venv
source venv/bin/acivate
pip install --upgrade pip
You will have a folder structure similar to this.
projects
└── venv
If you have installed Python in your PATH and PATHEXT.
python3.12 -m venv venv

C:\> venv\Scripts\activate.bat  # cmd.exe
PS C:\> venv\Scripts\Activate.ps1 # Powershell

pip install --upgrade pip
Otherwise use
c:\>c:\Python312\python -m venv c:\path\to\packages\my_env
PS C:\> <venv>\Scripts\Activate.ps1

C:\> venv\Scripts\activate.bat  # cmd.exe
PS C:\> venv\Scripts\Activate.ps1 # Powershell

pip install --upgrade pip
You will have a folder structure similar to this.
projects
└── venv
Install Dependencies
Change into your project directory.
cd <your django project folder>
Install dependencies.
pip install -r requirements_dev.txt
Create Django Secret Environment Variable
In settings.py, the Django secret key configuration is in an environment variable. See below.
# SECURITY WARNING: keep the secret key used in production secret!
SECRET_KEY = os.environ("DJANGO_SECRET_KEY")
Create a Django Secret key.
python -c 'from django.core.management.utils import get_random_secret_key; print(get_random_secret_key())'
You will see an output similat to this.
w#5cb$au3$t+hyj(f7ejgrk7$xet7_q@8m)5qd*c_*)nl1shwr
Danger
DO NOT USE THE NO LONGER A SECRET, SECRET KEY GENERATED HERE.
Copy and add the secret key to an environment variable.
export DJANGO_SECRET_KEY='w=#5cb$au3$t+hyj(f7ejgrk7$xet7_q@8m)5qd*c_*)nl1shwr'
printenv DJANGO_SECRET_KEY # To check it worked
w#5cb$au3$t+hyj(f7ejgrk7$xet7_q@8m)5qd*c_*)nl1shwr
export DJANGO_SECRET_KEY='w=#5cb$au3$t+hyj(f7ejgrk7$xet7_q@8m)5qd*c_*)nl1shwr'
printenv DJANGO_SECRET_KEY # To check it worked
w#5cb$au3$t+hyj(f7ejgrk7$xet7_q@8m)5qd*c_*)nl1shwr
Right-click the Computer icon and choose Properties, or in Windows Control Panel, choose System.
Choose Advanced system settings.
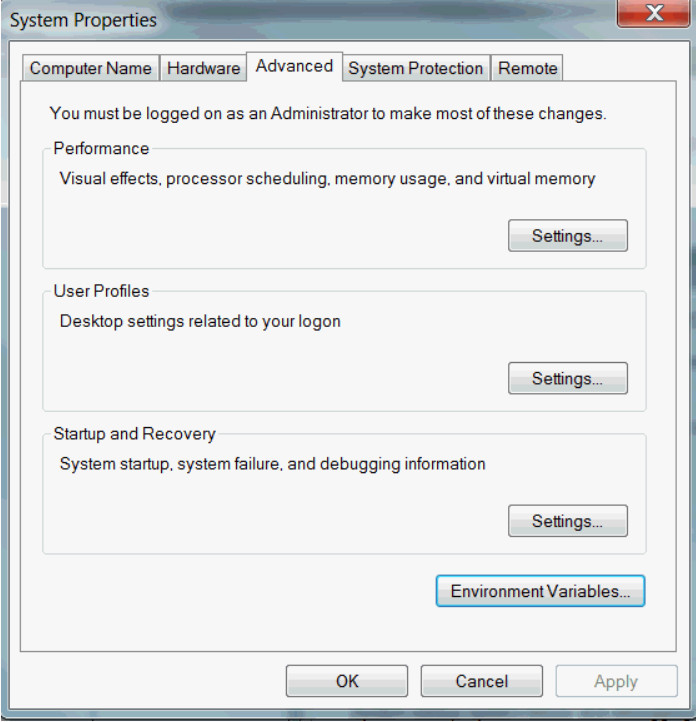
On the Advanced tab, click Environment Variables.
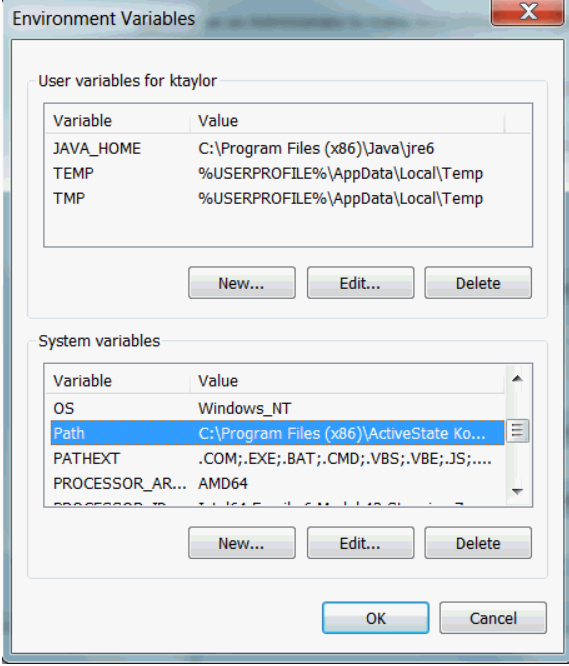
Click New to create a new environment variable.
After creating or modifying the environment variable, click Apply and then OK to have the change take effect.
Note
The graphical user interface for creating environment variables may vary slightly, depending on your version of Windows.
Run Your Project
python3 manage.py makemigrations
python3 manage.py migrate
python3 manage.py createsuperuser
python3 manage.py runserver
In your browser navigate to 127.0.0.1/admin
Congratulations, you have created your new Django project.
Depending on your chosen options, there are several ways to proceed with pushing to GitHub. If you are unsure, see our git push tutorial for more information.
Setup django-tailwind
django-tailwind has some dependencies. Installing these is quite simple to do.
Default Testing Database
By default, your Django project test DB is db.sqlite3.
See config/settings/test.py and .env/.testing.
...

# Selects which database to use for testing, default=sqlite3 .
TESTING_DATABASE = env(
    "TESTING_DJANGO_DATABASE",
    default="sqlite3",
)


if TESTING_DATABASE == "sqlite3":
    DATABASES = {
        "default": {
            "ENGINE": "django.db.backends.sqlite3",
            "NAME": BASE_DIR / "db.sqlite3",  # noqa: F405
        }
    }

else:
    DATABASES = {
        "default": env.db(
            "TESTING_DATABASE_URL",
        ),
    }
...

# Testing database options: sqlite3, other.
# If using other, a DB_URL connection string must be supplied.
TESTING_DATABASE=sqlite3
DB_URL=""
To select another testing database, you can:
Update .env/.testing variables with your preferences.
Provide ENV vars with your preferences.
...

# Testing database options: sqlite3, other.
# If using other, a DB_URL connection string must be supplied.
TESTING_DATABASE=other  # Change to other.
DB_URL=Your_connection_string_here
export TESTING_DATABASE=other
export DB_URL=Your_connection_string_here
Configure Logging
You can customise the logging configuration for each environment in the
respective .env file.
For more information see How-to logging.